Destination Insert Functions
Use Destination Insert Functions to enrich, transform, or filter your data before it reaches downstream destinations.
Implement advanced data computation: Write custom computation, operations, and business logic on streaming data that you send to downstream destinations.
Enrich your data: Use destination insert functions with Segment’s Profile API or third party sources to add additional context to your data and create personalized customer experiences.
Support data compliance: Use destination insert functions to support data masking, encryption, decryption, improved PII data handling, and tokenization.
Customize filtration for your destinations: Create custom logic with nested if-else statements, regex, custom business rules, and more to filter event data.
Destination Insert Functions in Public Beta
Destination Insert Functions is in Public Beta, and Segment is actively working on this feature. Some functionality may change before it becomes generally available. Contact Segment with any feedback or questions.
Create destination insert functions
There are two ways you can access destination insert functions from your Segment space:
- From the Connections catalog.
- From the Destinations tab.
Using the catalog
To create an insert function from Segment’s catalog:
- Navigate to Connections > Catalog > Functions and click New Function.
- From the Select Type screen, select Insert and click Next: Build Function.
- Write and test your function code. Manually enter a sample event and click Run to test.
- Click Next: Configure & Create to add a function name, description, and logo.
- Click Create Function to create your insert function. You’ll see the insert function displayed in the Functions tab.
For data to flow to your downstream destinations, you’ll need to connect your insert function to a destination:
- Select the insert function you’d like to connect. From the side pane, you can edit, delete, and connect the insert function.
- Click Connect a destination.
- Select the destination you’d like to connect to and click Connect to destination.
Using the Destinations tab
To access insert functions through the Destinations tab:
- Navigate to Connections > Destinations.
- Select your destination.
- Select Functions and then select your insert function.
Use this page to edit and manage insert functions in your workspace.
You can also use this page to enable destination insert functions in your workspace.
Code the destination insert function
Segment invokes a separate part of the function (called a “handler”) for each event type that you send to your destination insert function.
Your function isn’t invoked for an event if you’ve configured a destination filter, and the event doesn’t pass the filter.
The default source code template includes handlers for all event types. You don’t need to implement all of them - just use the ones you need, and skip the ones you don’t.
Removing the handler for a specific event type results in blocking the events of that type from arriving at their destination.
Insert functions can define handlers for each message type in the Segment spec:
onIdentifyonTrackonPageonScreenonGrouponAliasonDeleteonBatch
Each of the functions above accepts two arguments:
- event - Segment event object, where fields and values depend on the event type. For example, in “Identify” events, Segment formats the object to match the Identify spec.
- settings - Set of settings for this function.
The example below shows a function that listens for “Track” events, and sends some details about them to an external service.
async function onTrack(event) {
  await fetch('https://example-service.com/api', {
    method: 'POST',
    headers: {
      'Content-Type': 'application/json'
    },
    body: JSON.stringify({
      event_name: event.event,
      event_properties: event.properties,
      timestamp: event.timestamp
    })
  })

  return event;

}
To change which event type the handler listens to, you can rename it to the name of the message type. For example, if you rename this function onIdentify, it listens for “Identify” events instead.
Functions’ runtime includes a fetch() polyfill using a node-fetch package. Check out the node-fetch documentation for usage examples.
Errors and error handling
Segment considers a function’s execution successful if it finishes without error. You can throw an error to create a failure on purpose. Use these errors to validate event data before processing it to ensure the function works as expected.
You can throw the following pre-defined error types to indicate that the function ran as expected, but the data was not deliverable:
EventNotSupportedInvalidEventPayloadValidationErrorRetryError
The examples show basic uses of these error types.
async function onGroup(event) {
  if (!event.traits.company) {
    throw new InvalidEventPayload('Company name is required')
  }
}

async function onPage(event) {
  if (!event.properties.pageName) {
    throw new ValidationError('Page name is required')
  }
}

async function onAlias(event) {
  throw new EventNotSupported('Alias event is not supported')
}

async function onTrack(event) {
  let res
  try {
    res = await fetch('http://example-service.com/api', {
      method: 'POST',
      headers: {
        'Content-Type': 'application/json'
      },
      body: JSON.stringify({ event })
    })

    return event;

  } catch (err) {
    // Retry on connection error
    throw new RetryError(err.message)
  }
  if (res.status >= 500 || res.status === 429) {
    // Retry on 5xx and 429s (ratelimits)
    throw new RetryError(`HTTP Status ${res.status}`)
  }
}
If you don’t supply a function for an event type, Segment throws an EventNotSupported error by default.
You can read more about error handling below.
Create settings and secrets
Settings allow you to pass configurable variables to your function, which is the best way to pass sensitive information such as security tokens. For example, you might use settings as placeholders to use information such as an API endpoint and API key. This way, you can use the same code with different settings for different purposes. When you deploy a function in your workspace, you are prompted to fill out these settings to configure the function.
First, add a setting in Settings tab in the code editor:
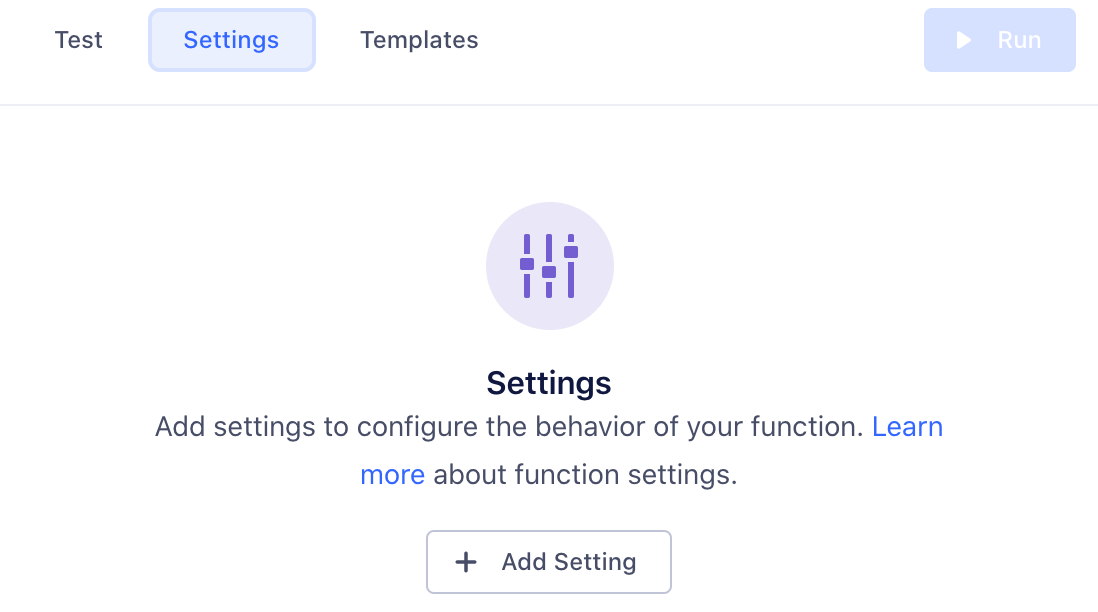
Click Add Setting to add your new setting.
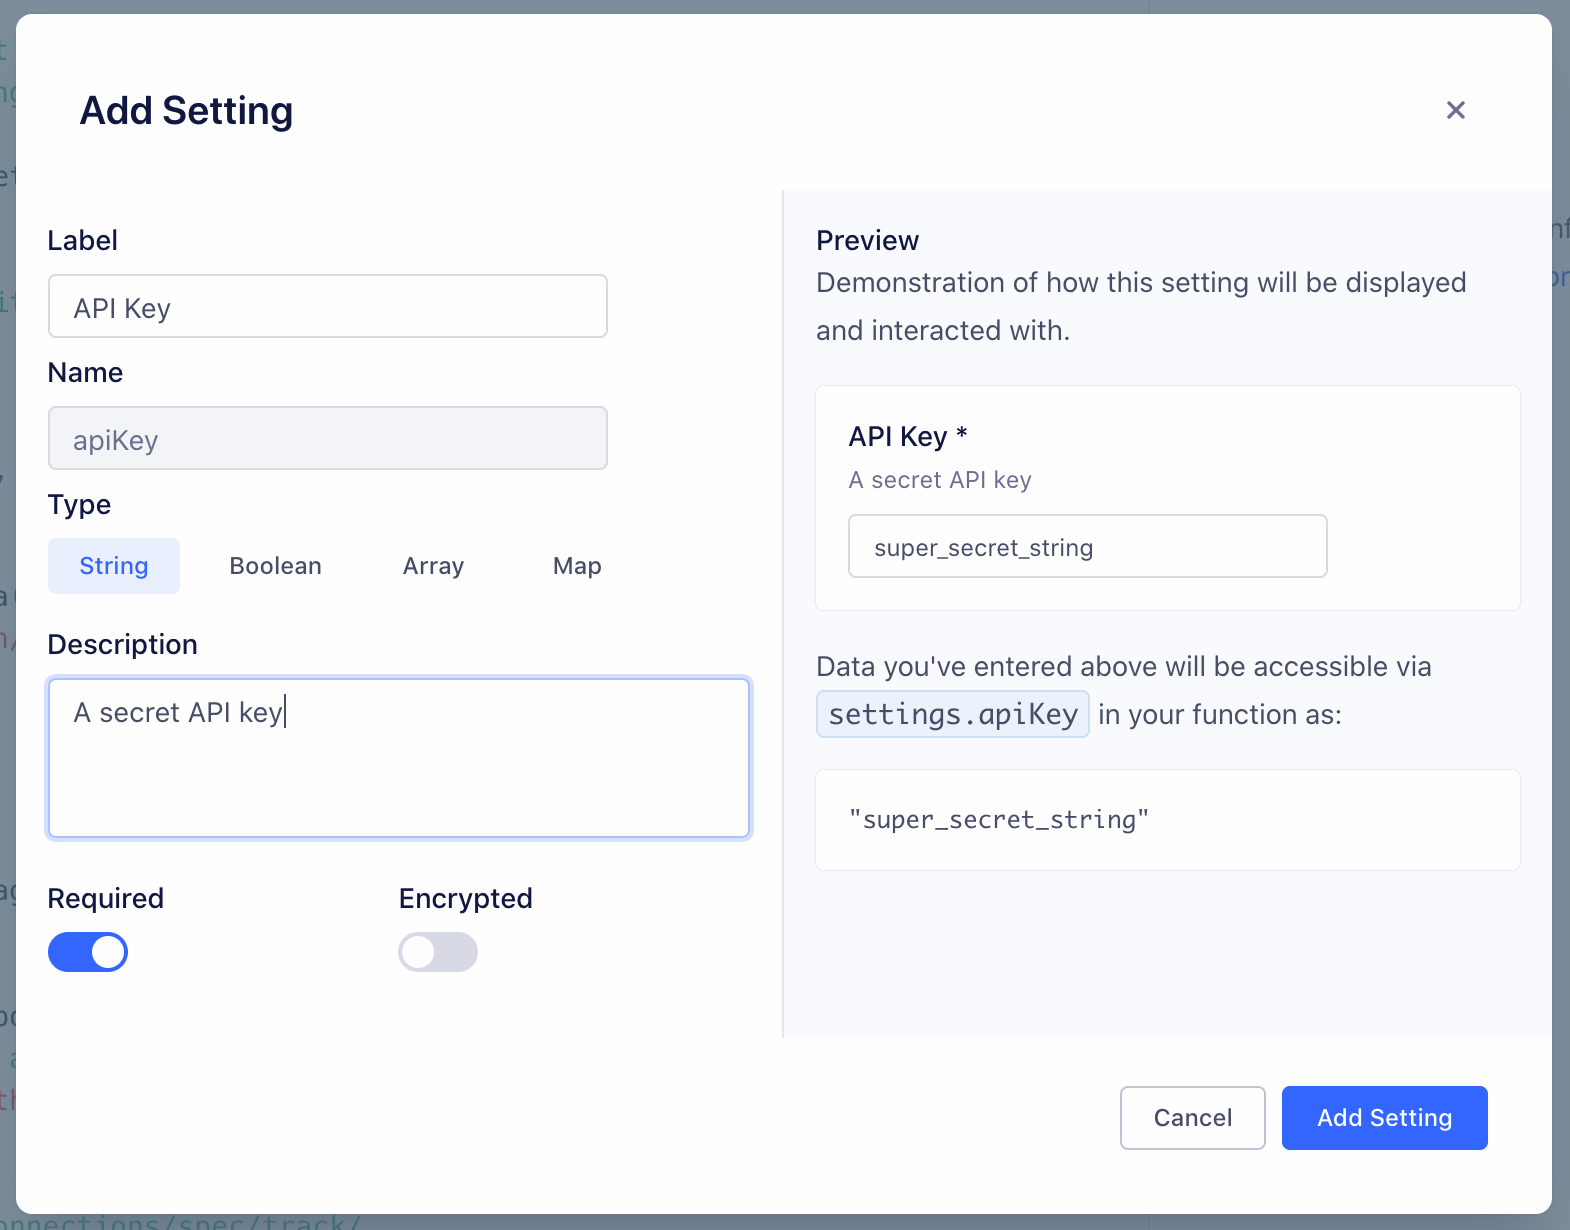
You can configure the details about this setting, which change how it’s displayed to anyone using your function:
- Label - Name of the setting, which users see when configuring the function.
- Name - Auto-generated name of the setting to use in function’s source code.
- Type - Type of the setting’s value.
- Description - Optional description, which appears below the setting name.
- Required - Enable this to ensure that the setting cannot be saved without a value.
- Encrypted - Enable to encrypt the value of this setting. Use this setting for sensitive data, like API keys.
As you change the values, a preview to the right updates to show how your setting will look and work.
Click Add Setting to save the new setting.
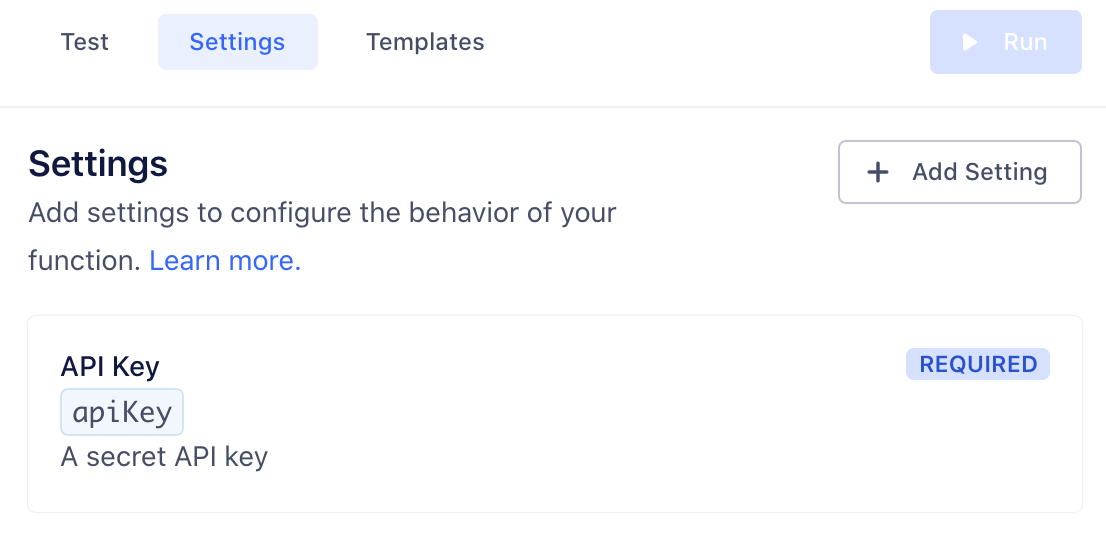
Once you save a setting, it appears in the Settings tab for the function. You can edit or delete settings from this tab.
Next, fill out this setting’s value in the Test tab, so you can run the function and verify that the correct setting value is passed. (This value is only for testing your function.)
Now that you’ve configured a setting and entered a test value, you can add code to read its value and run the function, as in the example below:
async function onTrack(request, settings) {
  const apiKey = settings.apiKey
  //=> "super_secret_string"
}
When you deploy your destination insert function in your workspace, you fill out the settings on the destination configuration page, similar to how you would configure a normal destination.
Test the destination insert function
You can manually test your code from the functions editor:
- From the Test tab, click customize the event yourself and manually input your own JSON payload.
- If your test fails, you can check the error details and logs in the Output section.
- Error messages display errors surfaced from your function.
- Logs display any messages to console.log() from the function.
-
info “” The Event Tester won’t make use of an Insert Function, show how an Insert Function impacts your data, or send data downstream through the Insert Function pipeline.
Save and deploy the destination insert function
Once you finish building your insert function, click Next: Configure & Create to name it, then click Create Function to save it.
Once you do that, you’ll see the insert function from the Functions page in your catalog.
If you’re editing an existing function, you can save changes without updating the instances of the function that are already deployed and running.
You can also choose to Save & Deploy to save the changes, then choose which already-deployed functions to update with your changes.
You may need additional permissions to update existing functions.
Enable the destination insert function
You need to enable your insert function for it to process your data.
To enable your insert function:
- Navigate to Connections > Destinations.
- Select your destination, then select the Functions tab.
- Select the Enable Function toggle, and click Enable on the pop-out window.
To prevent your insert function from processing data, toggle Enable Function off.
Destination insert functions error types
- Bad Request - Any error thrown by the function code that is not covered by the other errors.
- Invalid Settings - A configuration error prevented Segment from executing your code. If this error persists for more than an hour, contact Segment Support.
- Message Rejected - Your code threw
InvalidEventPayloadorValidationErrordue to invalid input. - Unsupported Event Type - Your code doesn’t implement a specific event type (for example,
onTrack()) or threw anEventNotSupportederror. - Retry - Your code threw
RetryErrorindicating that the function should be retried.
Segment only attempts to send the event to your destination insert function again if a Retry error occurs.
You can view Segment’s list of Integration Error Codes for more information about what might cause an error.
Destination insert functions logs
If your function throws an error, execution halts immediately. Segment captures the event, any outgoing requests/responses, any logs the function might have printed, as well as the error itself.
Segment then displays the captured error information in the Event Delivery page for your function. You can use this information to find and fix unexpected errors.
You can throw an error or a custom error and you can also add helpful context in logs using the console API. For example:
async function onTrack(event, settings) {
  const userId = event.userId

  console.log('User ID is', userId)

  if (typeof userId !== 'string' || userId.length < 8) {
    throw new ValidationError('User ID is invalid')
  }

  console.log('User ID is valid')
}
Don’t log sensitive data, such as personally-identifying information (PII), authentication tokens, or other secrets. Avoid logging entire request/response payloads. The Function Logs tab may be visible to other workspace members if they have the necessary permissions.
Caching in destination insert functions
Functions execute only in response to incoming data, but the environments that functions run in are generally long-running. Because of this, you can use global variables to cache small amounts of information between invocations. For example, you can reduce the number of access tokens you generate by caching a token, and regenerating it only after it expires. Segment cannot make any guarantees about the longevity of environments, but by using this strategy, you can improve the performance and reliability of your Functions by reducing the need for redundant API requests.
This example code fetches an access token from an external API and refreshes it every hour:
const TOKEN_EXPIRE_MS = 60 * 60 * 1000 // 1 hour
let token = null
async function getAccessToken () {
  const now = new Date().getTime()
  if (!token || now - token.ts > TOKEN_EXPIRE_MS) {
    const resp = await fetch('https://example.com/tokens', {
      method: 'POST'
    }).then(resp => resp.json())
    token = {
      ts: now,
      value: resp.token
    }
  }
  return token.value
}
Managing destination insert functions
Functions permissions
Functions have specific roles which can be used for access management in your Segment workspace.
Access to functions is controlled by two permissions roles:
- Functions Admin: Create, edit, and delete all functions, or a subset of specified functions.
- Functions Read-only: View all functions, or a subset of specified functions.
You also need additional Source Admin permissions to enable source functions, connect destination functions to a source, or to deploy changes to existing functions.
Editing and deleting functions
If you are a Workspace Owner or Functions Admin, you can manage your function from the Functions page.
Destination insert functions FAQs
Can I see who made changes to a function?
Yes, Functions access is logged in the Audit Trail, so user activity related to functions appears in the logs.
Does Segment retry failed function invocations?
Yes, Segment retries invocations that throw RetryError or Timeout errors (temporary errors only). Segment’s internal system retries failed functions API calls for four hours with a randomized exponential backoff after each attempt. This substantially improves delivery rates.
Retries work the same for both functions and cloud-mode destinations in Segment.
Are events guaranteed to send data in order?
No, Segment can’t guarantee the order in which the events are delivered to an endpoint.
Can I create a device-mode destination?
No, destination insert functions are currently available as cloud-mode destinations only. Segment is in the early phases of exploration and discovery for supporting customer “web plugins” for custom device-mode destinations and other use cases, but this is unsupported today.
How do I publish a destination to the public Segment catalog?
If you are a partner, looking to publish your destination and distribute your app through Segment catalog, visit the Developer Center and check out the Segment partner docs.
Are there any nuances to consider in using Insert Functions with Actions destinations?
Yes. Without Insert Functions enabled, a single event could trigger multiple mappings. With Insert Functions enabled, though, events only trigger one Actions mapping, even if more than one mapping is set up to run when a particular event is seen.
This page was last modified: 04 Aug 2023
Need support?
Questions? Problems? Need more info? Contact Segment Support for assistance!